
I whipped up a batch of Dog Treats Using Pumpkin with whole wheat flour, fresh pumpkin puree, free-from-xylitol peanut butter and eggs. These wholesome snacks bring out the best in natural ingredients, offering a hearty, nourishing treat without any fuss. I am excited to share my creative process with you.

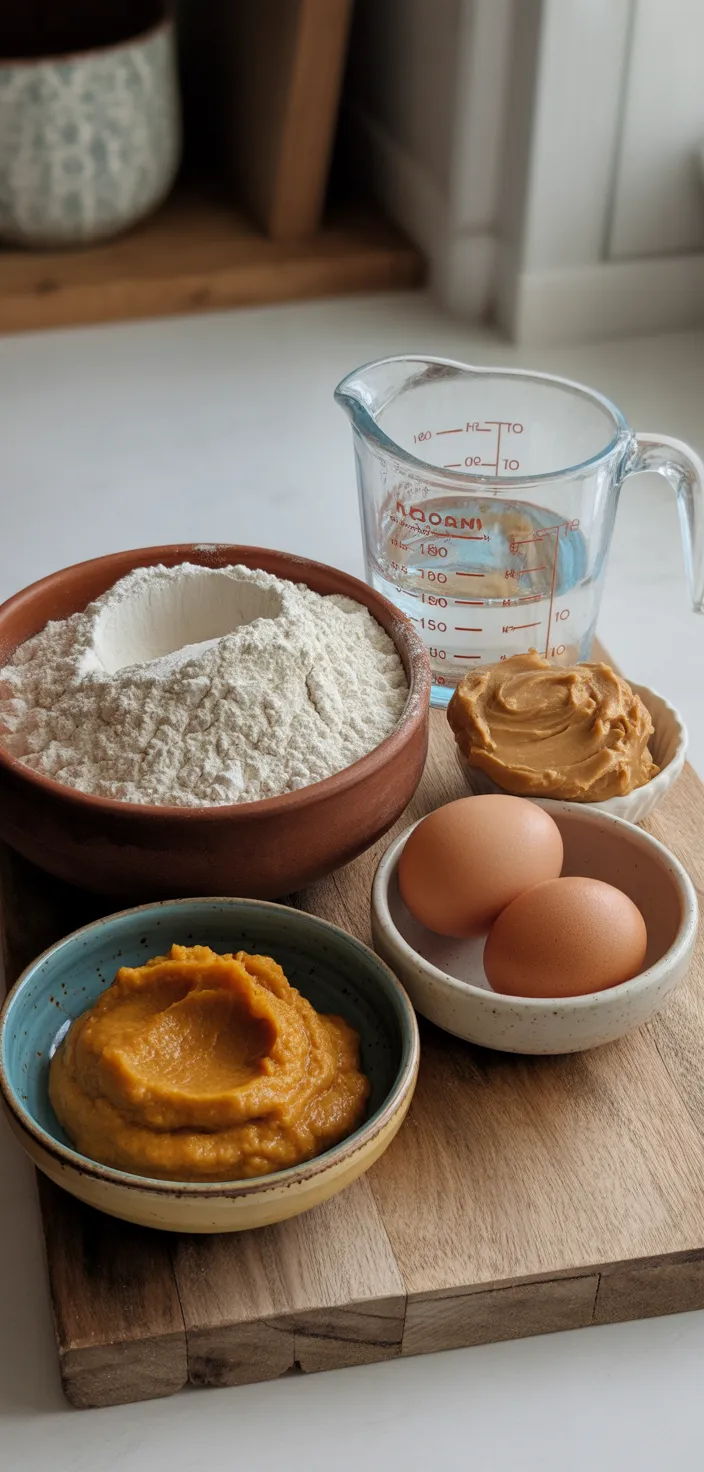
I’ve been working on a new batch of Pumpkin Dog Treats that i just had to share. I was kinda excited when i put together 2 1/2 cups of whole wheat flour, 1/2 cup plain canned pumpkin puree, 2 large eggs and 1/2 cup natural peanut butter (remember, it’s super important that it’s free of xylitol), then add just enough water to mix the dough.
These treats are more than just a snack—there’s a little bit of magic in them that reminds me of those special homemade dog cookie recipes that are both safe and fun. I always think of them as those special princess pinky girl dog treats meets sweet treats for dogs, making them perfect for any pet parent looking to share a little joy with their furry pal.
Trust me, once your dog gets a whiff of these, they wont be able to resist coming back for more! Enjoy making and sharing these treats with your bud.
Why I Like this Recipe
I like this recipe because it’s super simple to put together—mixing the whole wheat flour, canned pumpkin, eggs, and peanut butter means I get to create something really special without too much hassle.
I also appreciate that every ingredient is something I trust; making sure the peanut butter doesn’t have xylitol and using plain pumpkin gives me peace of mind knowing my dog is only getting healthy, natural treats.
Lastly, I love how these treats come out crunchy and a bit golden. Every time I bake them, my dog goes nuts (in a good way), and it’s just awesome to see him so excited about something homemade.
Ingredients
- Whole wheat flour: good source of carbohydrates and fiber; offers energy and texture in treats.
- Canned pumpkin puree: packed with vitamins and fiber, adds moisture and natural sweetness to treats.
- Eggs: help bind ingredients, provide protein and healthy fats for balanced nutrition.
- Natural peanut butter: rich in protein and healthy fats, gives a nutty flavor dogs enjoy.
- Water: helps adjust dough consistency, binding ingredients and creating a pliable treat mix.
Ingredient Quantities
- 2 1/2 cups whole wheat flour
- 1/2 cup canned pumpkin puree (plain, not pumpkin pie filling)
- 2 large eggs
- 1/2 cup natural peanut butter (make sure it’s free of xylitol)
- Water as needed (about 2 tablespoons to help mix the dough)
How to Make this
1. Preheat your oven to 350°F and line a baking tray with parchment paper.
2. In a large bowl, mix together the whole wheat flour, pumpkin puree, and eggs until they start to combine.
3. Stir in the peanut butter into your mix. If it’s too thick, slowly add about 2 tablespoons of water until a dough forms.
4. Once the dough together, knead it lightly on a floured surface so it’s smooth enough to roll out.
5. Roll out the dough to about 1/4 inch thick. If you find it sticks, use a little more flour on your rolling pin and board.
6. Cut out shapes using cookie cutters or slice the dough into small squares for bite-size treats.
7. Place your pieces on the prepared baking tray and try to leave some space between each treat.
8. Bake for around 20 to 25 minutes until they are firm and slightly golden.
9. Let the treats cool completely before giving them to your dog. Enjoy sharing these homemade snacks with your pup!
Equipment Needed
1. Oven – used for preheating and baking at 350°F
2. Baking tray – essential for placing the treats in the oven
3. Parchment paper – lines the tray to prevent the dough from sticking and to make clean up easier
4. Large mixing bowl – where you combine the flour, pumpkin puree, and eggs
5. Measuring cups and spoons – to accurately measure the ingredients like whole wheat flour, pumpkin puree, and water
6. Stirring utensil – a spoon or spatula to mix the ingredients together
7. Rolling pin – used to roll out the dough to about 1/4 inch thick
8. Flat, floured surface – needed for kneading the dough and to help with rolling it out
9. Cookie cutters or a knife – for cutting out shapes or slicing the dough into small squares
10. Cooling rack – to let the treats cool completely after baking
FAQ
Pumpkin Dog Treats Recipe Substitutions and Variations
- Swap whole wheat flour with all-purpose flour or oat flour if you’re looking for a different texture
- You can replace the pumpkin puree with mashed sweet potato, just make sure it’s plain
- If you dont have eggs, try using a flax egg or even a bit of unsweetened applesauce to help bind the dough
- Replace natural peanut butter with sunflower seed butter if you’re worried about allergies or if you just want a different flavor
- Instead of water, a light chicken broth can be used to add a bit more savory taste to the treats
Pro Tips
1. If your dough is stickin’ or too messy, sprinkle a bit more flour onto your work surface before kneading. It helps a lot and makes rollin’ it way easier.
2. Try chillin’ the dough in the fridge for like 15 minutes if it’s super soft. This makes it firmer so your cookie cutters won’t end up ruining the shapes.
3. Don’t cram all your treats together on the tray when you bake ’em. Leaving a little space between pieces lets the heat get to every bit evenly, so they come out crisp and not soggy.
4. Once out of the oven, let the treats cool off completely before you give them to your dog. Rushing it might mess up the texture and could even burn your pup’s mouth.
Pumpkin Dog Treats Recipe
My favorite Pumpkin Dog Treats Recipe
Equipment Needed:
1. Oven – used for preheating and baking at 350°F
2. Baking tray – essential for placing the treats in the oven
3. Parchment paper – lines the tray to prevent the dough from sticking and to make clean up easier
4. Large mixing bowl – where you combine the flour, pumpkin puree, and eggs
5. Measuring cups and spoons – to accurately measure the ingredients like whole wheat flour, pumpkin puree, and water
6. Stirring utensil – a spoon or spatula to mix the ingredients together
7. Rolling pin – used to roll out the dough to about 1/4 inch thick
8. Flat, floured surface – needed for kneading the dough and to help with rolling it out
9. Cookie cutters or a knife – for cutting out shapes or slicing the dough into small squares
10. Cooling rack – to let the treats cool completely after baking
Ingredients:
- 2 1/2 cups whole wheat flour
- 1/2 cup canned pumpkin puree (plain, not pumpkin pie filling)
- 2 large eggs
- 1/2 cup natural peanut butter (make sure it’s free of xylitol)
- Water as needed (about 2 tablespoons to help mix the dough)
Instructions:
1. Preheat your oven to 350°F and line a baking tray with parchment paper.
2. In a large bowl, mix together the whole wheat flour, pumpkin puree, and eggs until they start to combine.
3. Stir in the peanut butter into your mix. If it’s too thick, slowly add about 2 tablespoons of water until a dough forms.
4. Once the dough together, knead it lightly on a floured surface so it’s smooth enough to roll out.
5. Roll out the dough to about 1/4 inch thick. If you find it sticks, use a little more flour on your rolling pin and board.
6. Cut out shapes using cookie cutters or slice the dough into small squares for bite-size treats.
7. Place your pieces on the prepared baking tray and try to leave some space between each treat.
8. Bake for around 20 to 25 minutes until they are firm and slightly golden.
9. Let the treats cool completely before giving them to your dog. Enjoy sharing these homemade snacks with your pup!


